
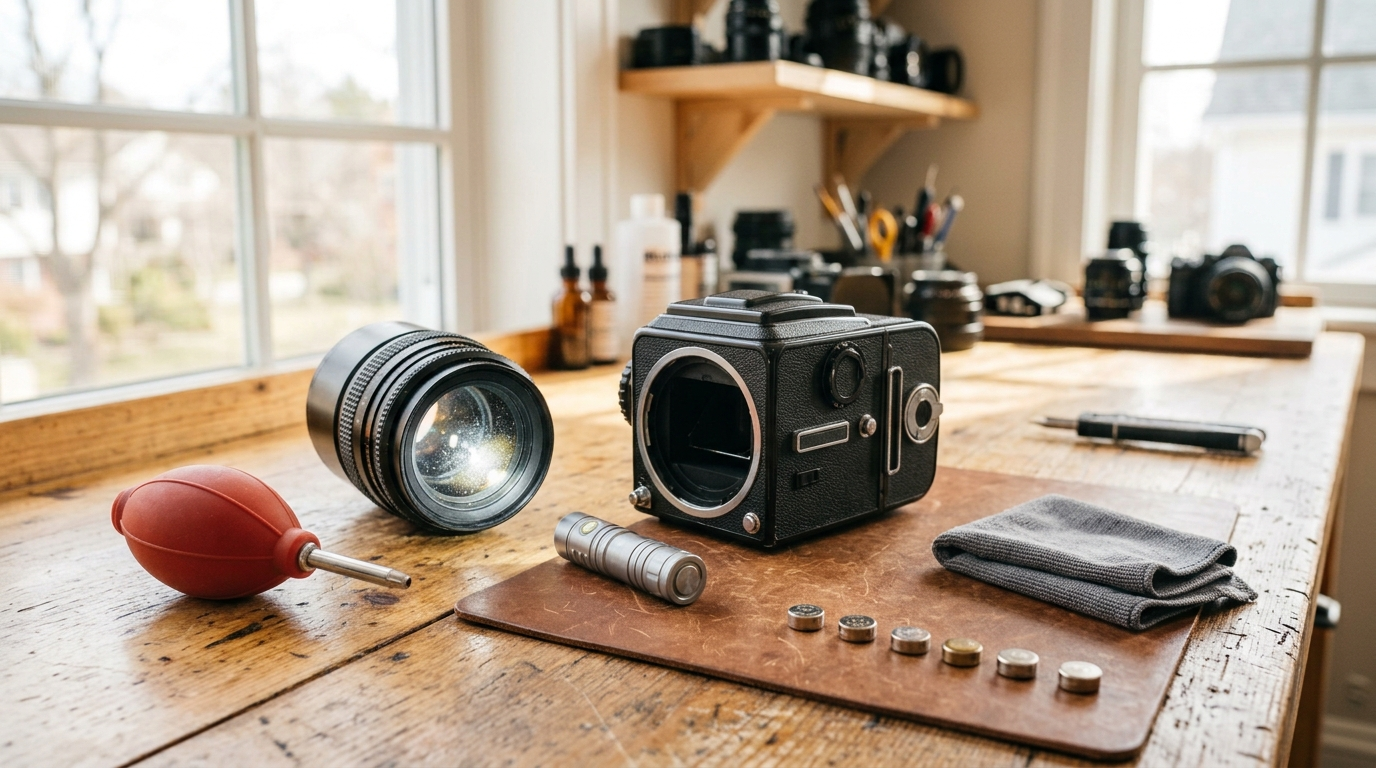
When you see a listing from Japan that says “Exc+++” or “Near Mint,” have you ever wondered what actually happened before those words were typed? Somewhere in Japan, someone sat at a desk with the camera in their hands, a small flashlight, and a decision to make.
Today I want to show you that desk. This is the fourth article in what has quietly become a series from the seller’s side of the screen: first how Japanese condition grades work, then how to buy from a Japanese seller, then how the box gets packed. This time: what I check before a camera ever becomes a listing — and why it matters to you, the buyer, more than you might think. Because at the end of this article, I am going to hand you my checklist and ask you to run it yourself, on your own kitchen table, the day your camera arrives.
The usual caveat first: this is my routine. I have spent years selling and shipping Japanese cameras to overseas buyers, but I cannot tell you that every Japanese seller works this way. I can only open my own drawer.
My inspection routine: outside, inside, then moving parts
Whatever lands on my desk, the order is always the same: exterior first, optics second, operation third, accessories last. There is a simple logic to it — start with what needs no tools, and work inward toward the things that can hide.
For a camera body
- Exterior. Scratches, dents, corrosion. I turn the body under the light and let my fingers do half the work — a dent often feels bigger than it looks.
- Power. Fresh battery in, switch on. Does it wake up? Do the displays light?
- Viewfinder. Look through it toward a light. Dust, haze, fungus, a dim or discolored view.
- Shutter. Fire it. Listen to it. At different speeds if the camera allows.
- Film chamber. Open the back. Light seals, the pressure plate, anything sticky or crumbling.
- Battery compartment. The classic hiding place for trouble — corrosion from a battery someone left in for a decade.
For a lens
- Exterior. Same as a body — scratches, dents, especially the filter thread and mount.
- Inside the glass. I hold the lens up and shine a small flashlight through it from behind, at an angle. This is the single most important step, and the slowest — fungus and haze that are invisible in room light show up instantly against a beam of light.
- Focus ring. Full travel, both directions. Smooth? Gritty? Loose?
- Aperture ring. Click through every stop.
- Aperture blades. Watch them open and close. Oily blades, slow blades, blades that do not move — this is where lenses fail quietly. (And, as you will see below, where they sometimes only pretend to fail.)
The tools on my desk
Nothing exotic:
- A small flashlight — the one tool I would not give up. Fungus hides from ceiling lights; it cannot hide from a beam shone through the glass.
- An air duster — to blow off dust before I judge, so I am not mistaking a speck on the surface for a mark inside.
- A microfiber cloth — the eyeglass-cleaning kind.
- A box of assorted batteries — old cameras take odd batteries, and “untested” often just means “nobody had the right battery.”
One tool I do not own yet but keep thinking about: a magnifying loupe that clamps to the table — the kind with a built-in light would be perfect. For now, my eyes and the flashlight do the job.
Time-wise, one camera or lens takes me 5 to 10 minutes. And within those minutes, the single biggest share goes to one thing: staring through glass, deciding whether what I see is fungus, haze, dust, or nothing at all. Everything else in the routine is quick. Reading a lens is not.
Where I draw the junk line
In my earlier article on condition grades I wrote about the Japanese idea of “junk” listings — sold openly as not working, for parts or repair. Here is where that line sits on my own desk:
- Shutter does not fire → junk, no debate. A camera that cannot take a picture is not a camera yet; it is a project.
- Fungus → depends on size. If it is clearly visible to me — not a maybe, not a fleck I have to hunt for — it goes to junk. A faint trace gets described exactly as a faint trace.
- Cannot test it → sold as junk. If I have no way to confirm something works, I do not guess in the item’s favor.
- Ordinary wear — light scratches, brassing, worn leatherette → normal item. That is what condition grades are for; wear gets described, not hidden.
The two lessons one camera taught me in a single evening
Yesterday, a medium format kit landed on my desk: a PENTAX 645 body and a 200mm f/4 lens for it. Between them, they managed to teach me both halves of what inspection really is.
The body: proving that “dead” really means dead
The body looked lovely. Clean exterior, and the LCD panel lit up perfectly — which made what came next stranger: the shutter would not fire. Nothing.
Here is the part of the job people do not see. “The shutter didn’t fire” is not a conclusion; it is the start of a checklist. Maybe the battery is weak — fresh batteries in. Maybe the contacts are dirty — cleaned them. The 645 will not fire without its film insert seated properly — took it out, reseated it. Power off, power on. Only after every innocent explanation was eliminated did I let myself write the verdict: shutter inoperative.
So it was listed as junk, described as exactly that — this time on the Japanese domestic market. And it found a buyer almost immediately. That surprised me a little the first time it happened with other items, but not anymore: here inside Japan there is a whole quiet population of repairers and parts hunters — a domestic safety net most overseas buyers never see, and a dead camera with a clear description is, to them, not a sad story — it is raw material. A camera’s life here does not end at “broken.”
The lens: the “broken” aperture that was working perfectly
Then I picked up the 200mm lens, looked into it, and my stomach dropped: the aperture blades would not close. I turned the ring — nothing moved. For a moment I had mentally written the junk label already.
Then I made myself slow down and think about how this lens actually works. It is an automatic-aperture lens: on its own, off the camera, the blades are supposed to sit wide open. They only stop down at the instant of exposure, when the camera pushes a little lever on the mount. And on the A (auto) position, the ring does nothing by design. So I moved the ring off A, reached around to the mount, pushed that small aperture lever with a fingertip — and the blades snapped shut, crisp and instant, like they were showing off. Completely, boringly normal.
If I had trusted my first reaction, a perfectly healthy lens would have been condemned as junk. Which is the lesson I want to hand to you, framed:
“Looks broken” and “is broken” are two different things — and the gap between them is knowledge of how the thing is supposed to behave.
Now it is your turn: the arrival check
Here is why I told you all of this. Everything above works in both directions. The same routine that catches problems before a camera is listed will catch problems the moment a camera arrives — and the sooner a problem is found, the cleaner the fix.
So when your camera from Japan lands on your table, give it the same 5 to 10 minutes, in the same order:
- Exterior. Turn it under a light. Compare what you see with the listing photos and description.
- Optics. Look through the viewfinder toward a light. For a lens, shine a phone flashlight through the glass from behind, at an angle — you will see what the seller saw.
- Operation. Battery in, power on, fire the shutter. Focus ring, aperture ring, blades.
- Accessories. Caps, straps, hoods, whatever the listing promised.
Two things to keep in mind while you do it:
- Before declaring something broken, spend two minutes asking whether it might be a “200mm moment.” Old cameras are full of behavior that looks like a fault and is not: aperture blades that stay open off the camera, shutters that lock until film is advanced, meters that need a battery you have not installed. A quick search for “[your model] + [the symptom]” costs nothing and can save both of us an awkward conversation.
- If something genuinely is wrong — say so early, with evidence. Clear photos, a plain description of the symptom, sent through the platform without delay. From the seller’s side, that kind of message is easy to act on and easy to trust. I wrote exactly how to do this, step by step, in the buying guide.
A problem found on day one, with photos, is a small and solvable event. The same problem found three weeks later is a much harder story for everyone.
Summary
- My routine, every time: exterior → optics → operation → accessories. Bodies get power, viewfinder, shutter, film chamber, battery compartment; lenses get glass, focus ring, aperture ring, blades.
- Tools: a small flashlight (the hero), air duster, microfiber cloth, a box of batteries. 5–10 minutes per item — most of it spent reading the glass.
- My junk line: dead shutter or untestable means junk; clearly visible fungus means junk; ordinary wear means a normal item, described as it is.
- One PENTAX 645 evening, two lessons: prove a fault before you call it one — and remember that “looks broken” is not “is broken.”
- When your camera arrives: run the same check, in the same order, the same day. Rule out the “200mm moments,” and if something is truly wrong, report it early and with evidence.
The next time you read “Exc+++” on a listing from Japan, you will know what it can stand for: a desk, a flashlight, ten quiet minutes, and someone deciding that this one is ready to be yours. When it arrives, give it your own ten minutes. That is where a good deal actually gets confirmed — not on the listing page, but on your table, in the light.

コメント